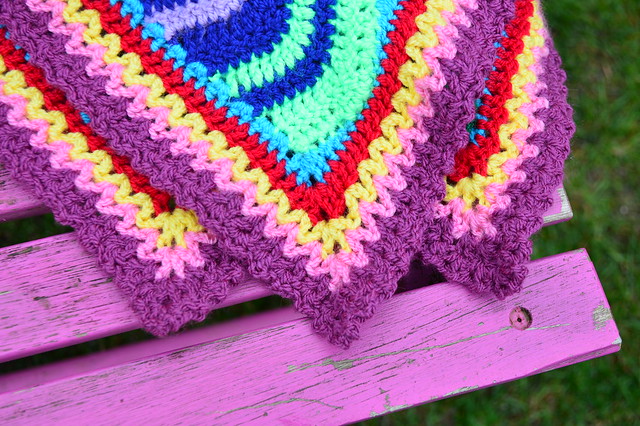
I thought today I'd show you how I did the edging as it is deceptively simple but produces a nice effect
So, onwards with my first crochet tutorial...
Now I'm going to assume you have a basic knowledge of crochet stitches. I'm going to be using English crochet terms but I'll put the American translation afterwards in brackets. Just to confuse things more I crochet left handed so I work from left to right.
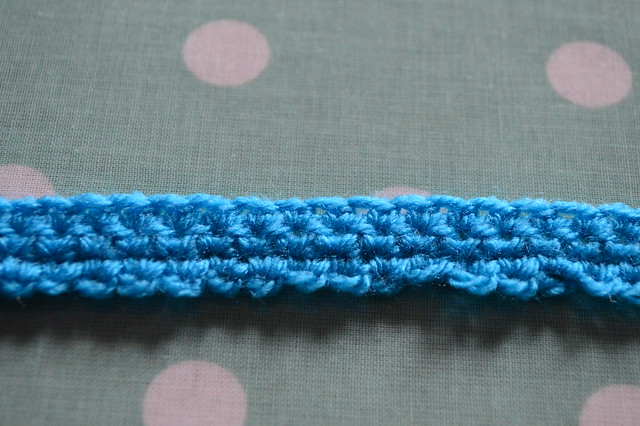
I started off by edging my blanket using the blue yarn and a double crochet (single crochet) stitch. I straightened up the edges of the ripple by using Little Tin Bird's tutorial. For the purpose of this tutorial I have made a quick line of double crochet (single crochet) stitches.
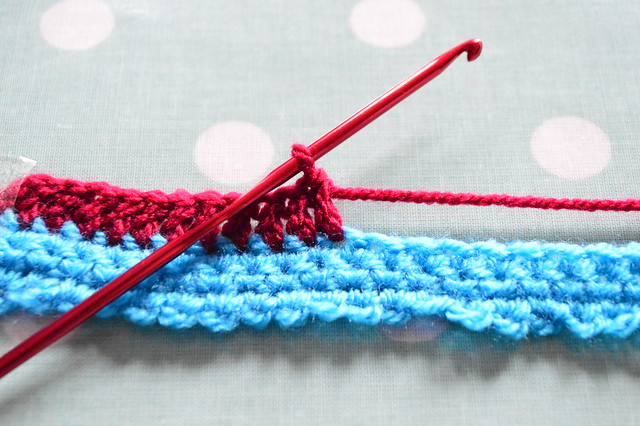
Next take your second colour and put a treble crochet (double crochet) into each stitch, just through the top two loops of the previous stitch like you would do normally
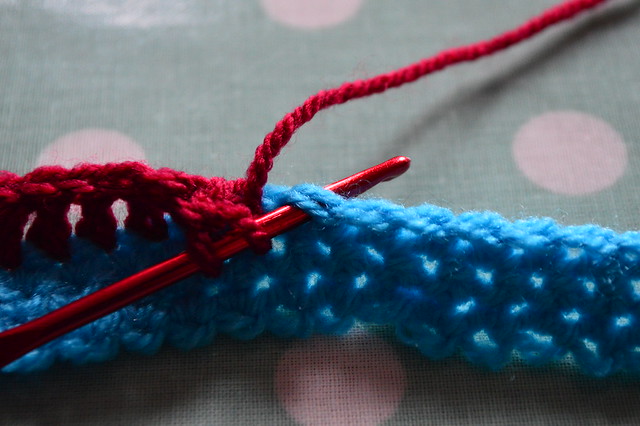
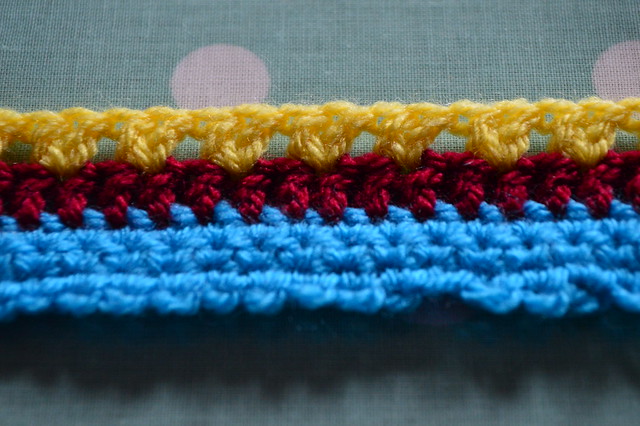
Work all the way to the end and then chose your third colour. This will form the Zig Zag effect, I found a lighter colour made it stand out more but play around and see what looks best to you. This time you will continue to put your hook through the top two loops but you only do every other stitch. Make two treble crochet (double crochet) stitches in every other stitch and continue along the row
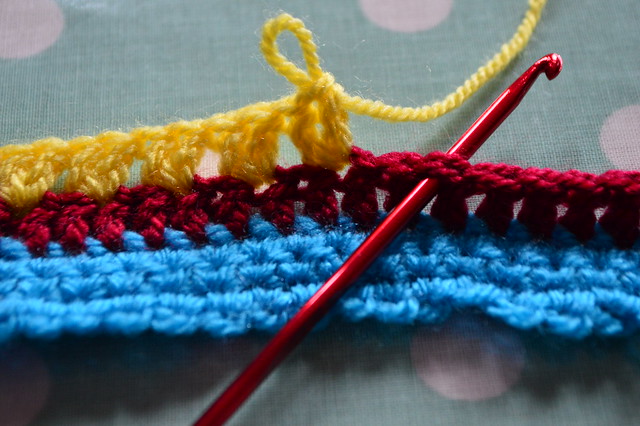
I didn't bother putting any chain spaces between the pairs of treble (double) stitches but if you're a tight crocheter you might find it helps. It should come out looking something like this
For the next round we're going to continue in this way but instead of putting your hook through the top loops of the previous stitch you need to put it in the middle of the two paired stitches on the previous row
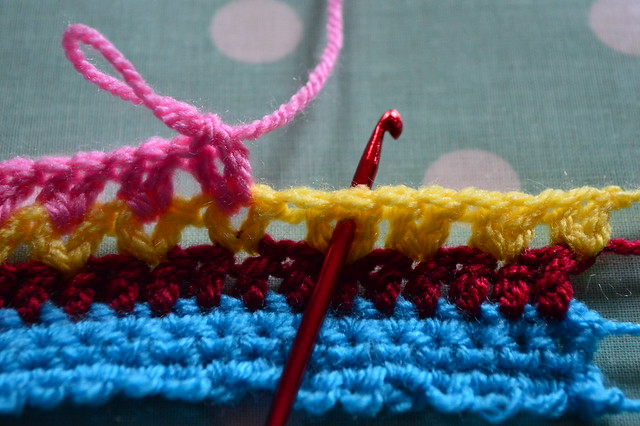
Work to the end of the row. Look we have Zig Zag's!

Continue repeating the previous row as many times as you want
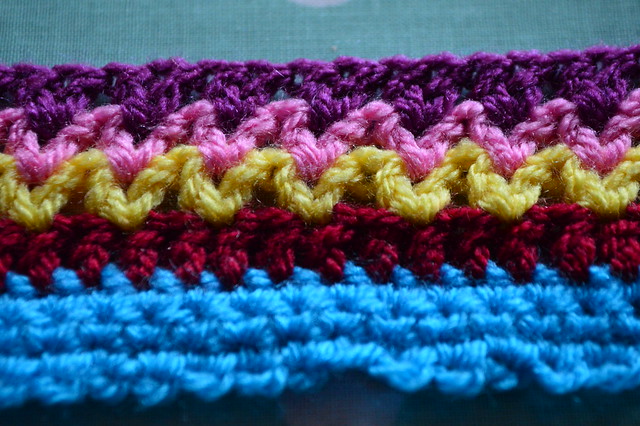
On the last row do not break the yarn, instead we're going to make the little picot bits. Continue putting your hook between the paired stitches of the previous row.
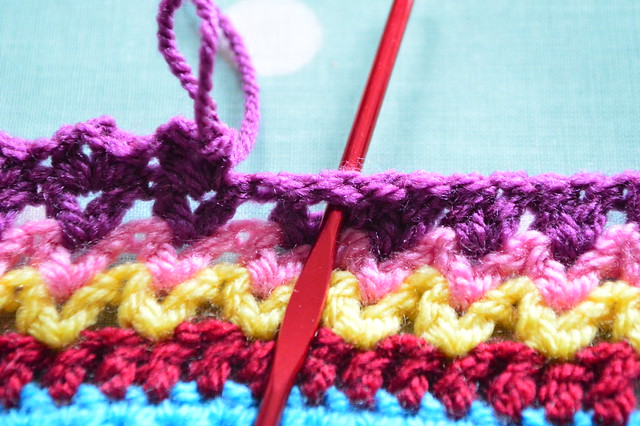
To make the picot you need to make a double crochet stitch (single crochet) then two chains and then another double crochet (single crochet) stitch into the same space. Then just work your way along to the end :-)

Ta da! Cute huh?
For the corners I made two sets of the paired stitches separated by two chains. If you have a preferred way of making corners then feel free to modify it. If you've got any questions then feel free to message me and I'll see if I can help :-)
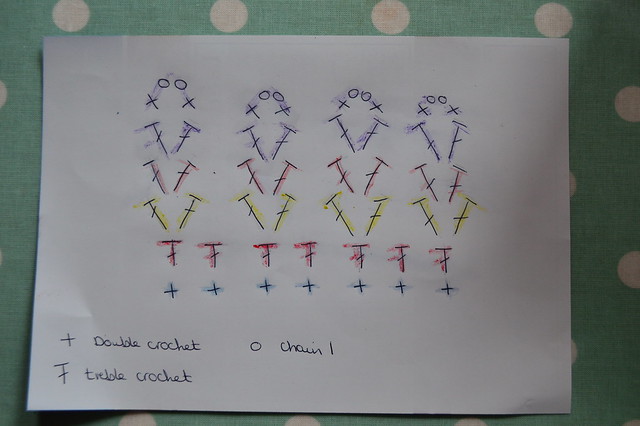
I've also had a go at drawing a crochet chart. I'm not 100% sure if I'm right with it but hopefully together with the pictures it will help to make sense of my waffling
For translating the UK crochet terms to American crochet I used this site. Most crocheters seem to be fairly bilingual anyway so hopefully it won't cause too many problems.
I'd love to know what you guys think of this tutorial and if anyone has a play around with this edging then please send me a link to a photo as I'd love to see :-)
Evelyn

Great first time tutorial!! I am using this border technique on my next project. Love all the colors you chose too!!
ReplyDeleteThank you :) Looking forward to seeing it :)
DeleteWonderful tutorial! Thank you so much for sharing. I am a not much or a crocheter but I understood exactly what you were trying to convey.
ReplyDeleteA very pretty border! Thanks for sharing, dear Evelyn :-). Greetings, Nata
ReplyDeleteThat is brilliant. I am saving this and will definitely use it for my next blanket edging. Many thanks.
ReplyDeleteVery fun edging you've come up with. It's amazing how a decorative edging adds so much zing to a hooked blanket.
ReplyDeleteThis looks fabulous - it's really similar to the border I did on my Disco Willow about the same time too; great minds really must think alike!! I love how it looks as you build up the zig zag rounds, and that final round is really cute. I'll definitely try it like this some time. Thank you! :)
ReplyDeleteDx
Thank you Debbie :)
Delete